Advanced Creative Management & Optimization
This guide walks you through how to use the Advanced Creative Management feature. The tool is designed to maximize campaign performance by prioritising & serving your best-performing creative assets.
What is the Advanced Creative Management & Optimization?
Advanced Creative Management & Optimization is a feature designed to enhance how creative assets are uploaded, managed, and delivered. It replaces the previous manual workflow with a centralized system that supports:
-
Multi-Size Offer Sets: Bundling multiple creative sizes into a single offer so the system can serve the creative basis its delivery split rather than creating one offer for each creative.
-
Adaptive Video Rendering: Uploading multiple video variants (different resolutions/sizes) under a single Creative ID to optimize playback based on the user's network bandwidth.
-
Centralised Management: Moving from direct URL entry to a structured "Manage Creatives" workflow where assets (Self-Hosted or Third-Party) are created as distinct entities before assignment.
-
Granular Reporting: Tracking performance at the specific Creative ID and Creative Name level rather than just the offer level.
Key Benefits of Advanced Creative Management & Optimization?
-
Maximised Campaign Performance: The system prioritizes and serves the best-performing creative variants, resulting in higher CTR, conversions, and overall effectiveness.
-
Automated Efficiency: It significantly reduces the manual effort required for A/B testing and constant creative tuning.
-
Granular Creative Insights: Users gain access to detailed performance data for individual creative variants, allowing for precise analysis of what works best.
-
Scalable Management: The feature efficiently supports the dynamic optimization of multiple creative assets and sizes without the need for complex, manual line-item setups.
How to Use the Advanced Creative Management & Optimization: Step-by-Step Guide
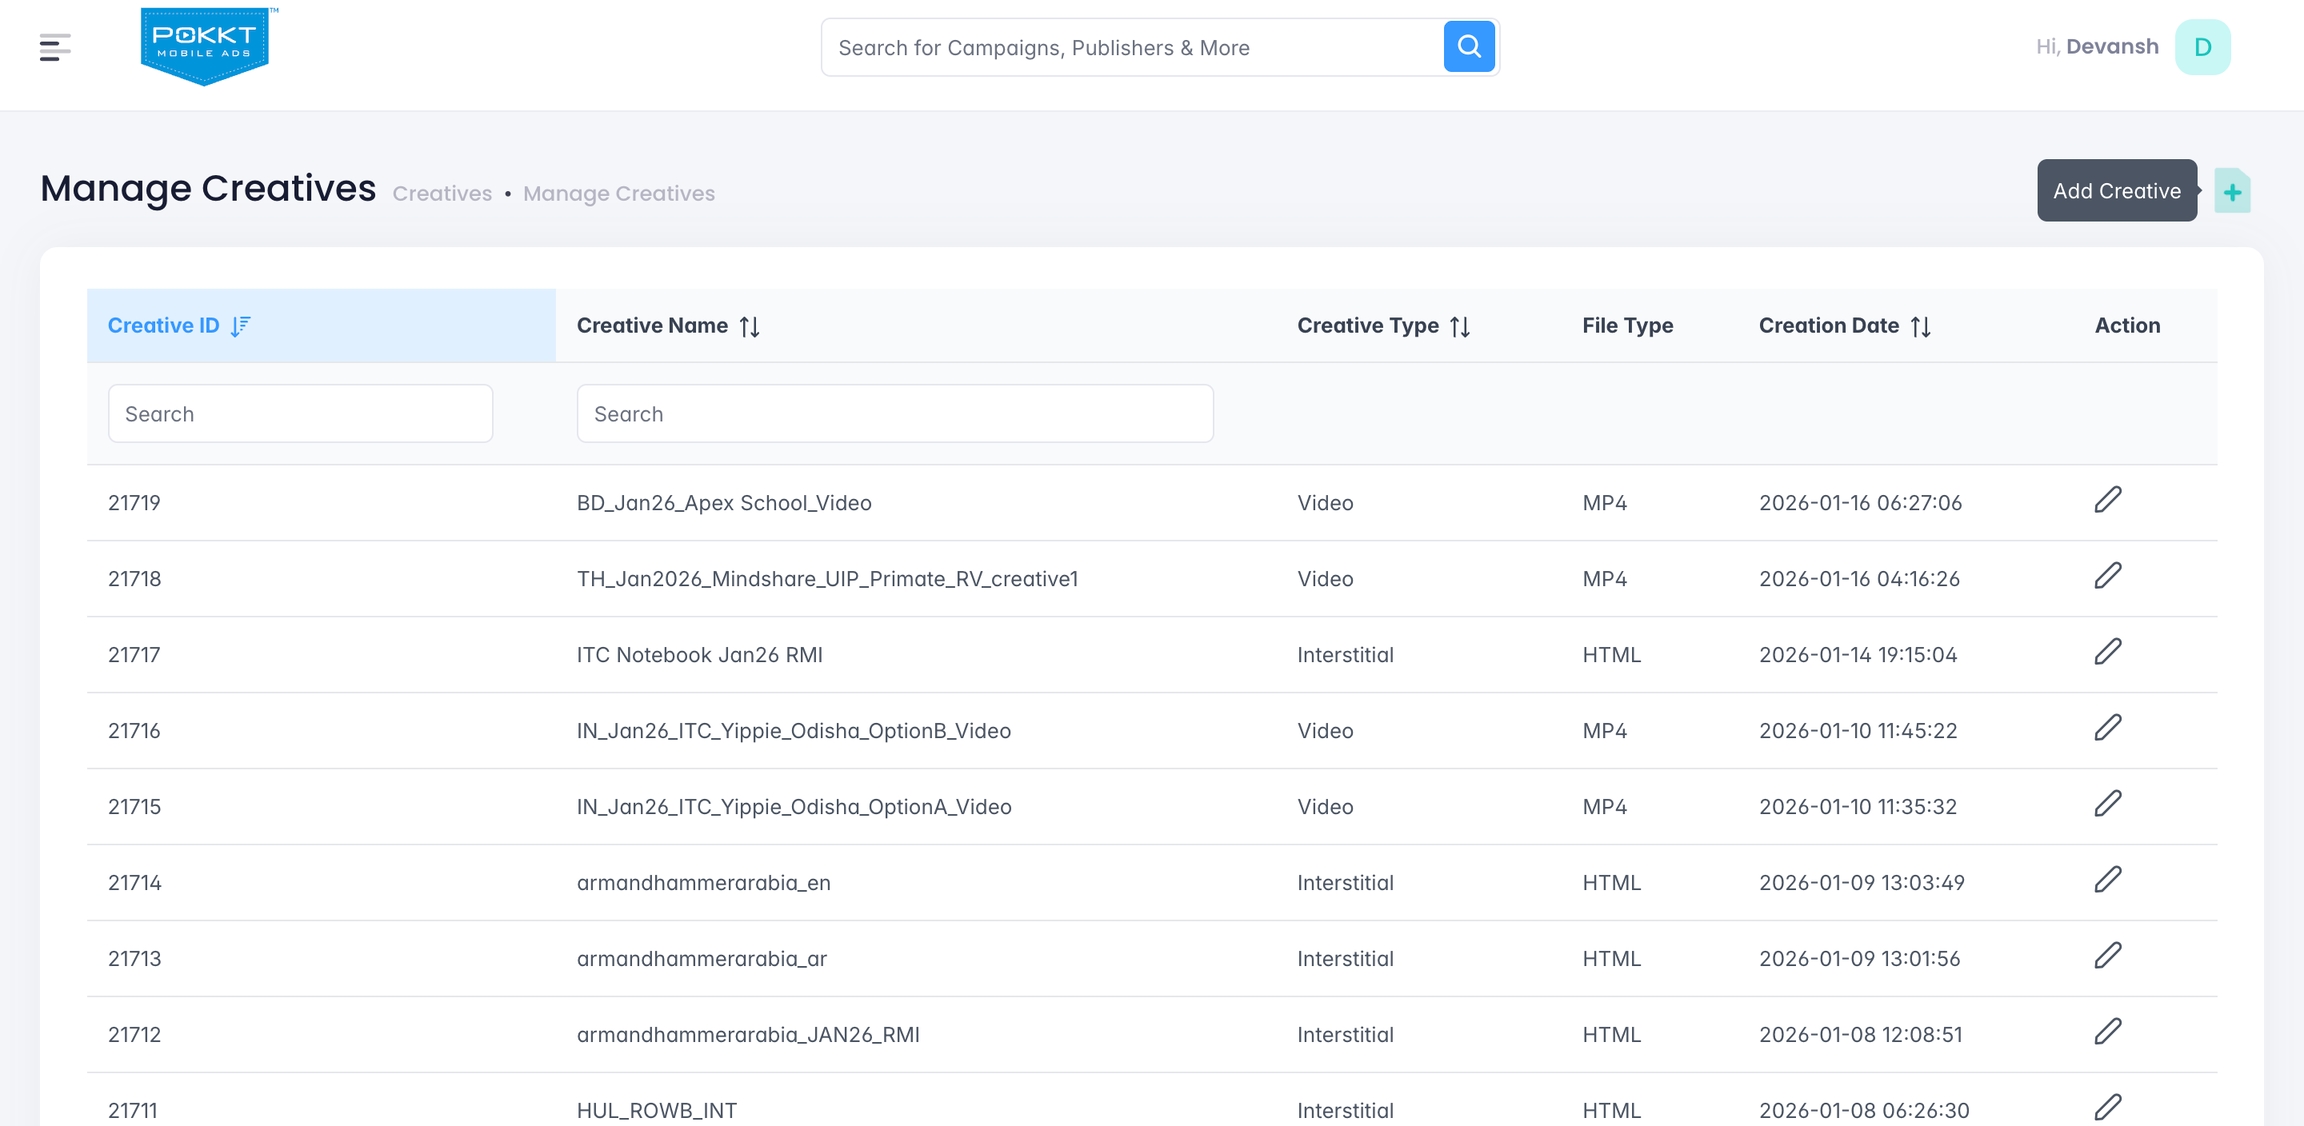
Step 1: Navigate to the Manage Creatives Tab
-
Navigate to the Manage Creatives section in the dashboard using the left nav bar.
-
To begin a new setup, click the Add Creative button.
Step 2: Select Creative Host Type
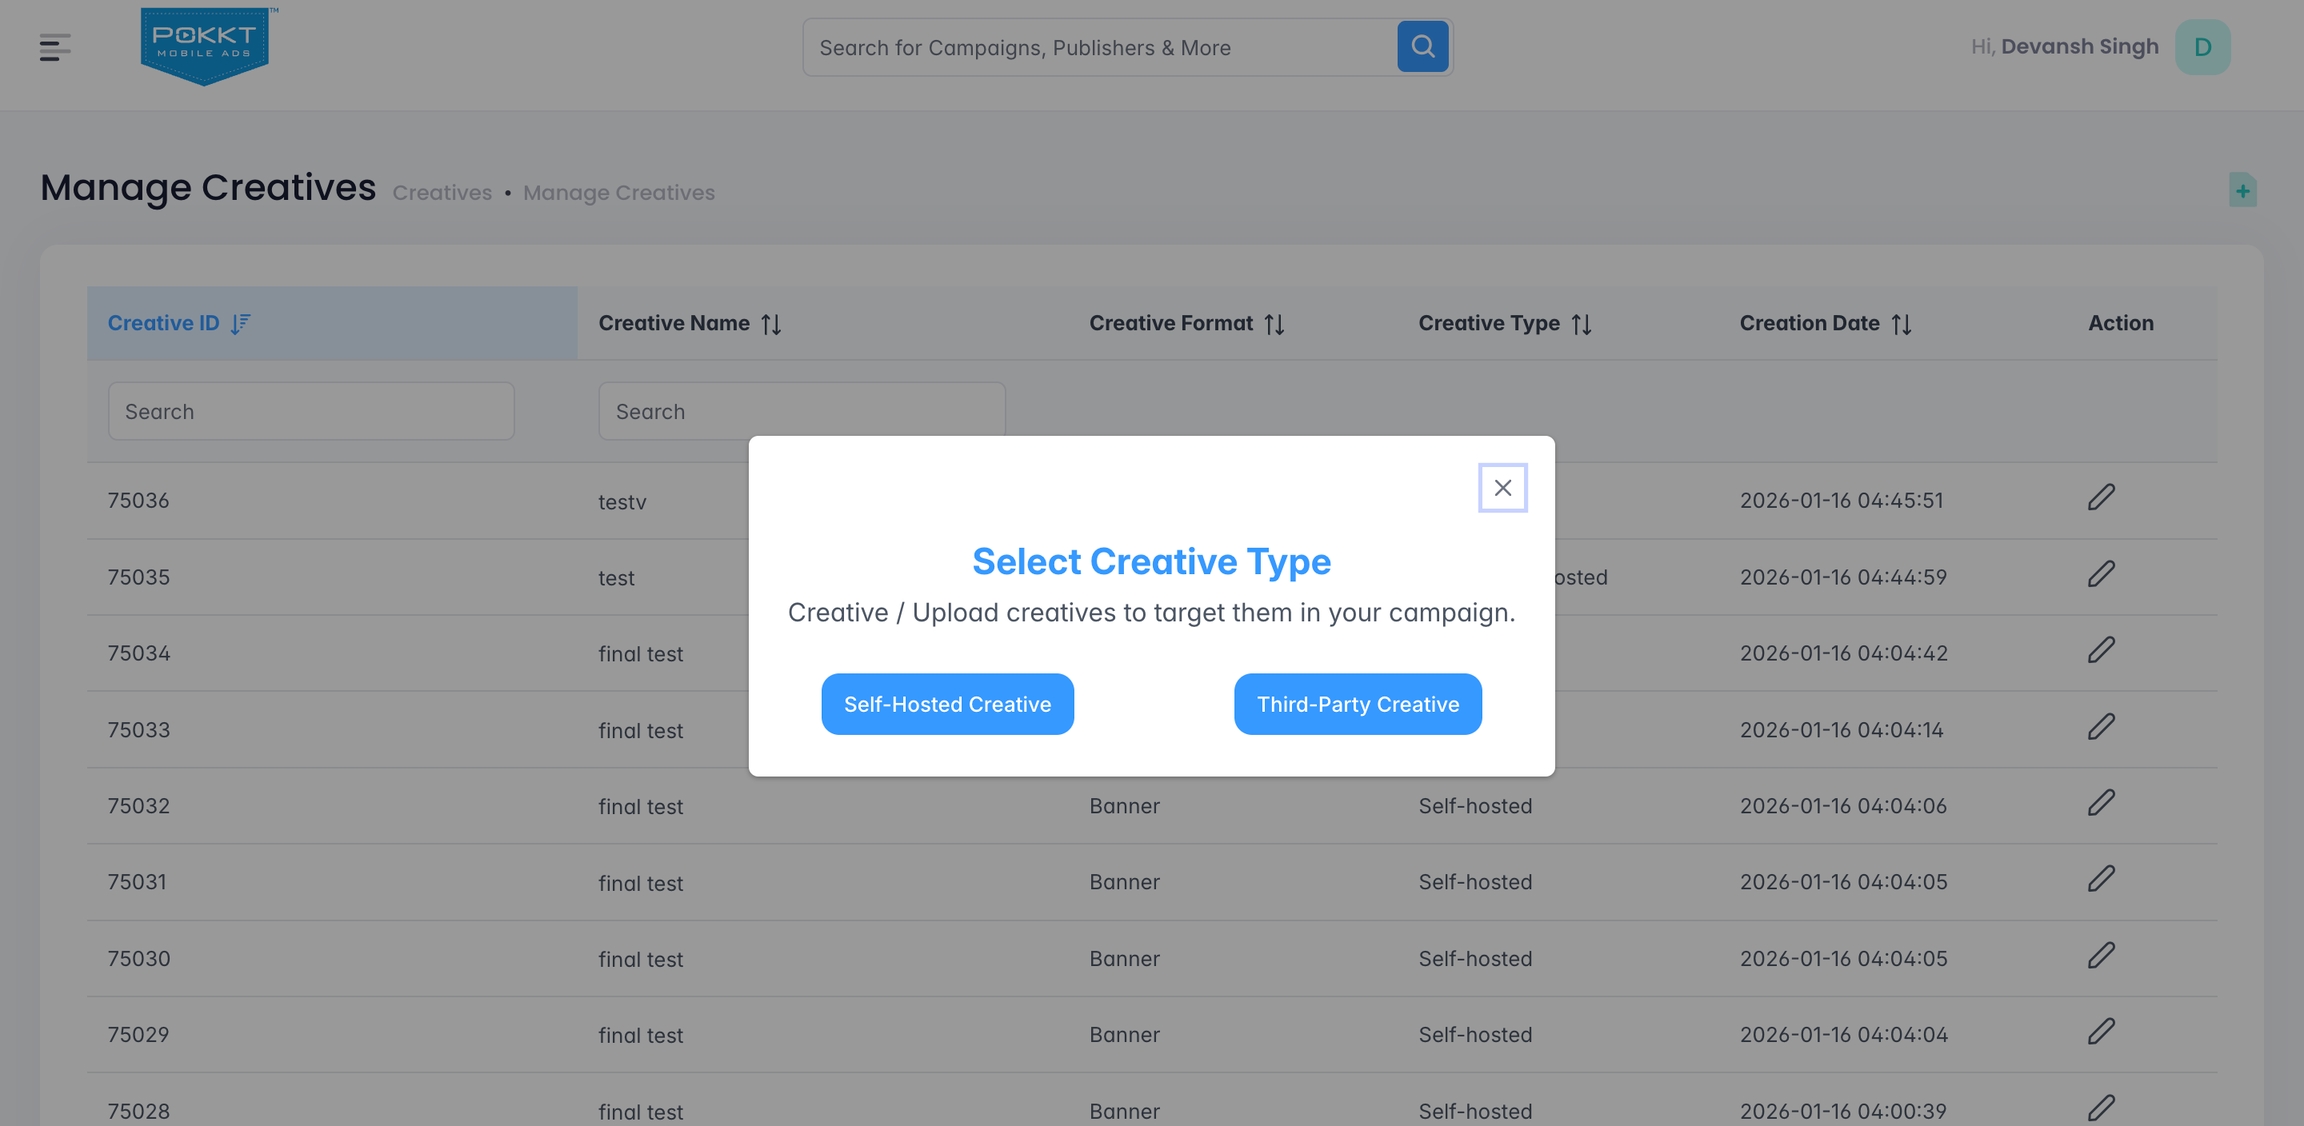
You will be prompted to choose how your creative is hosted. Select the appropriate option based on your asset source:
-
Self-Hosted Creative: For assets you upload directly to the POKKT DSP.
-
Third-Party Creative: For external VAST ad tags and other creative ad tag URLs.
Step 4: Configure Your Creative
Depending on your selection in Step 2, follow the specific instructions below:
Option A: Self-Hosted Creatives
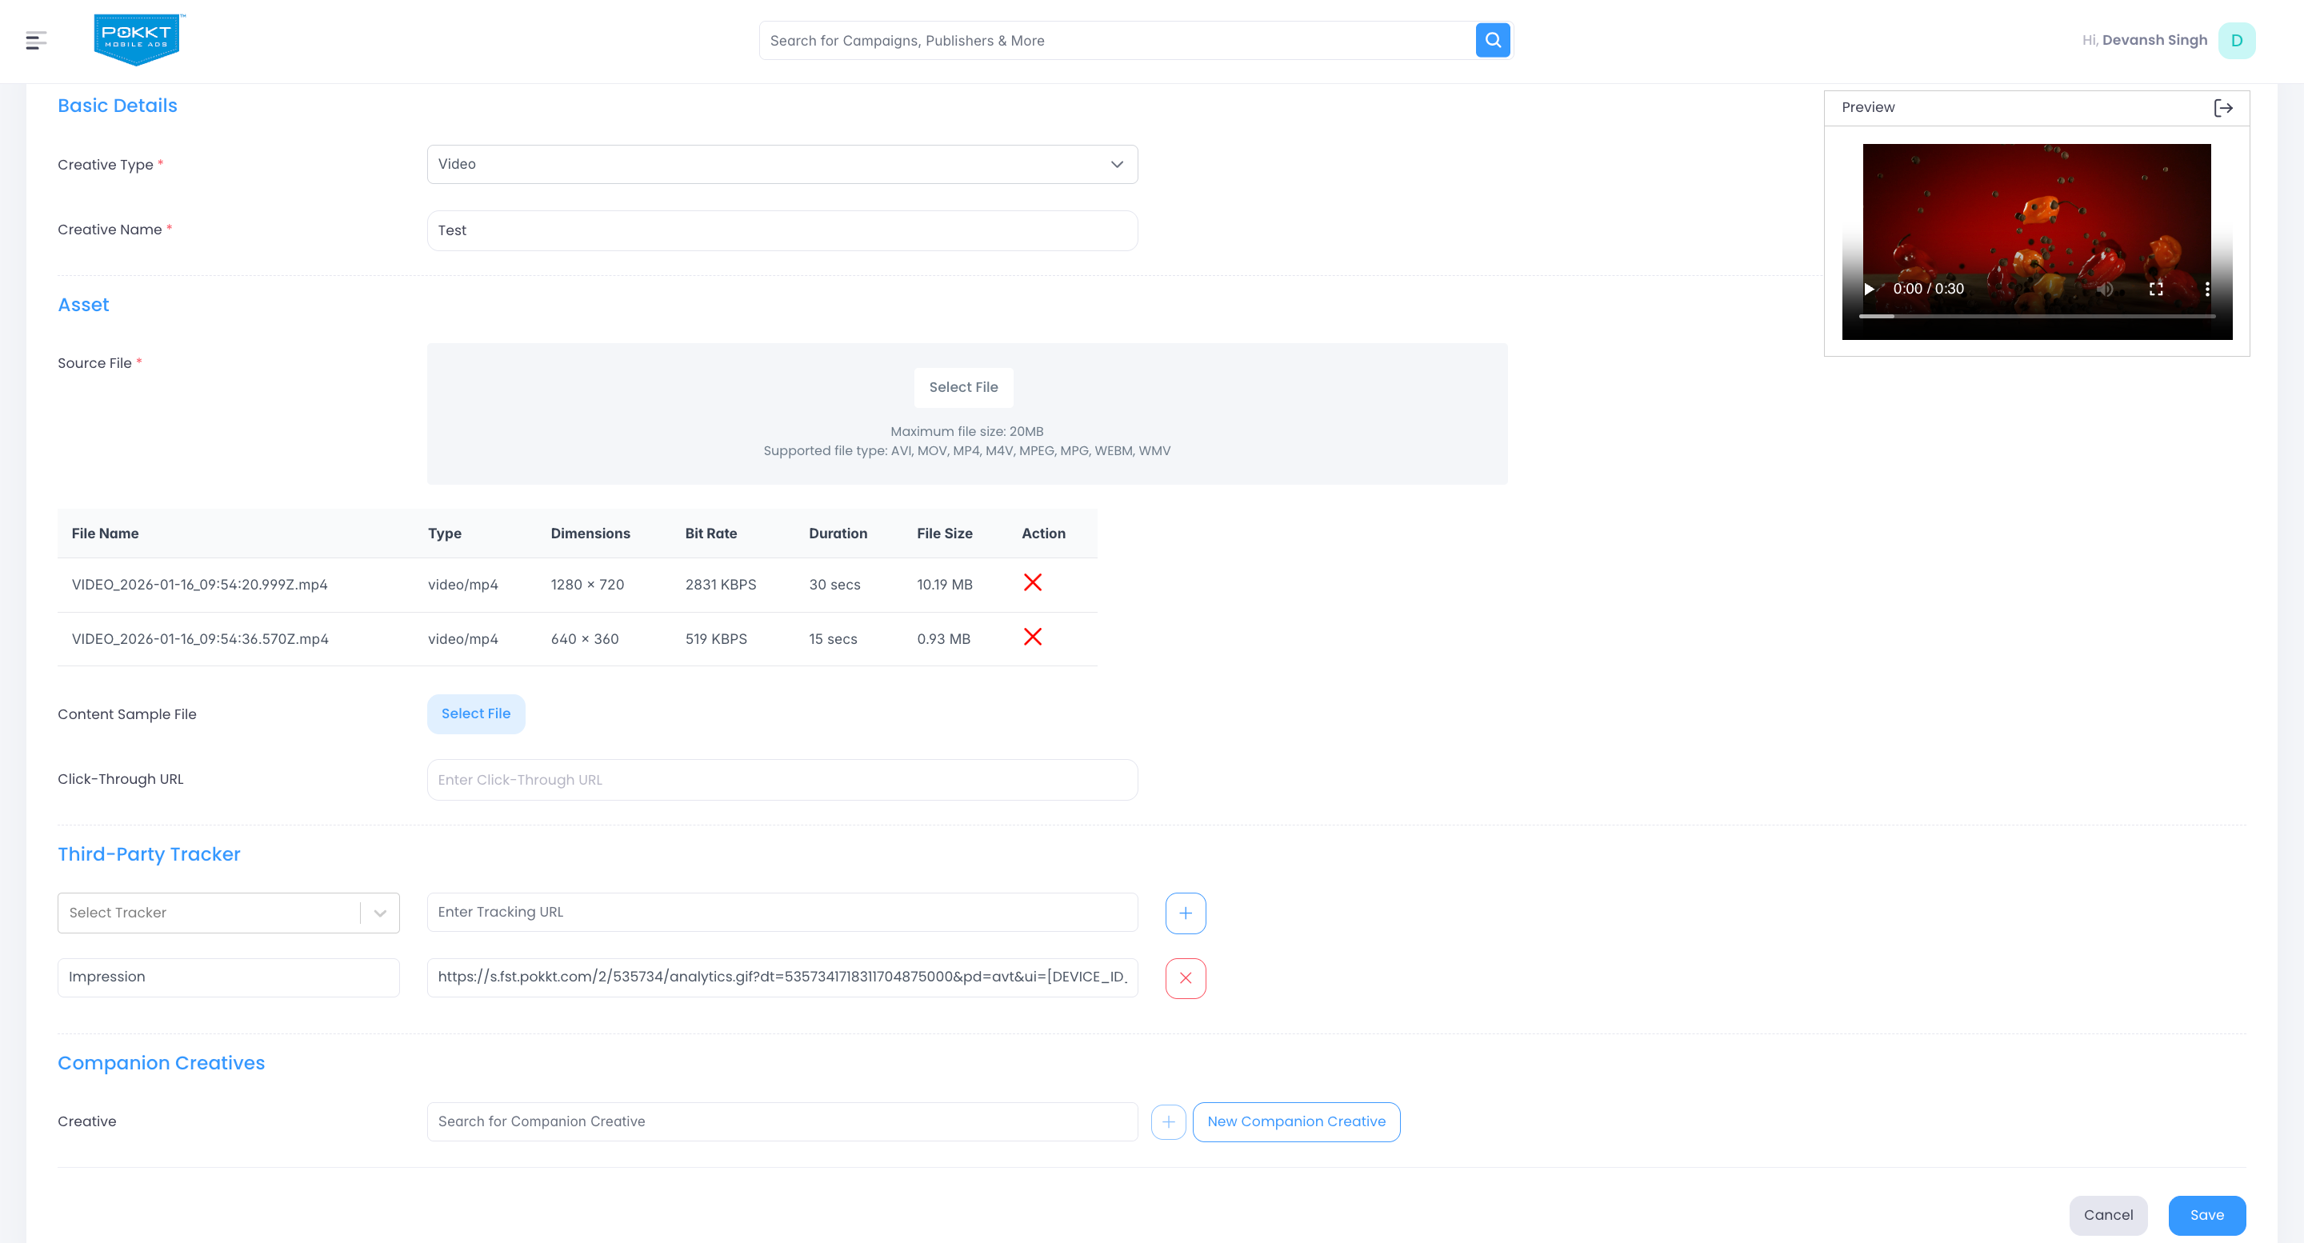
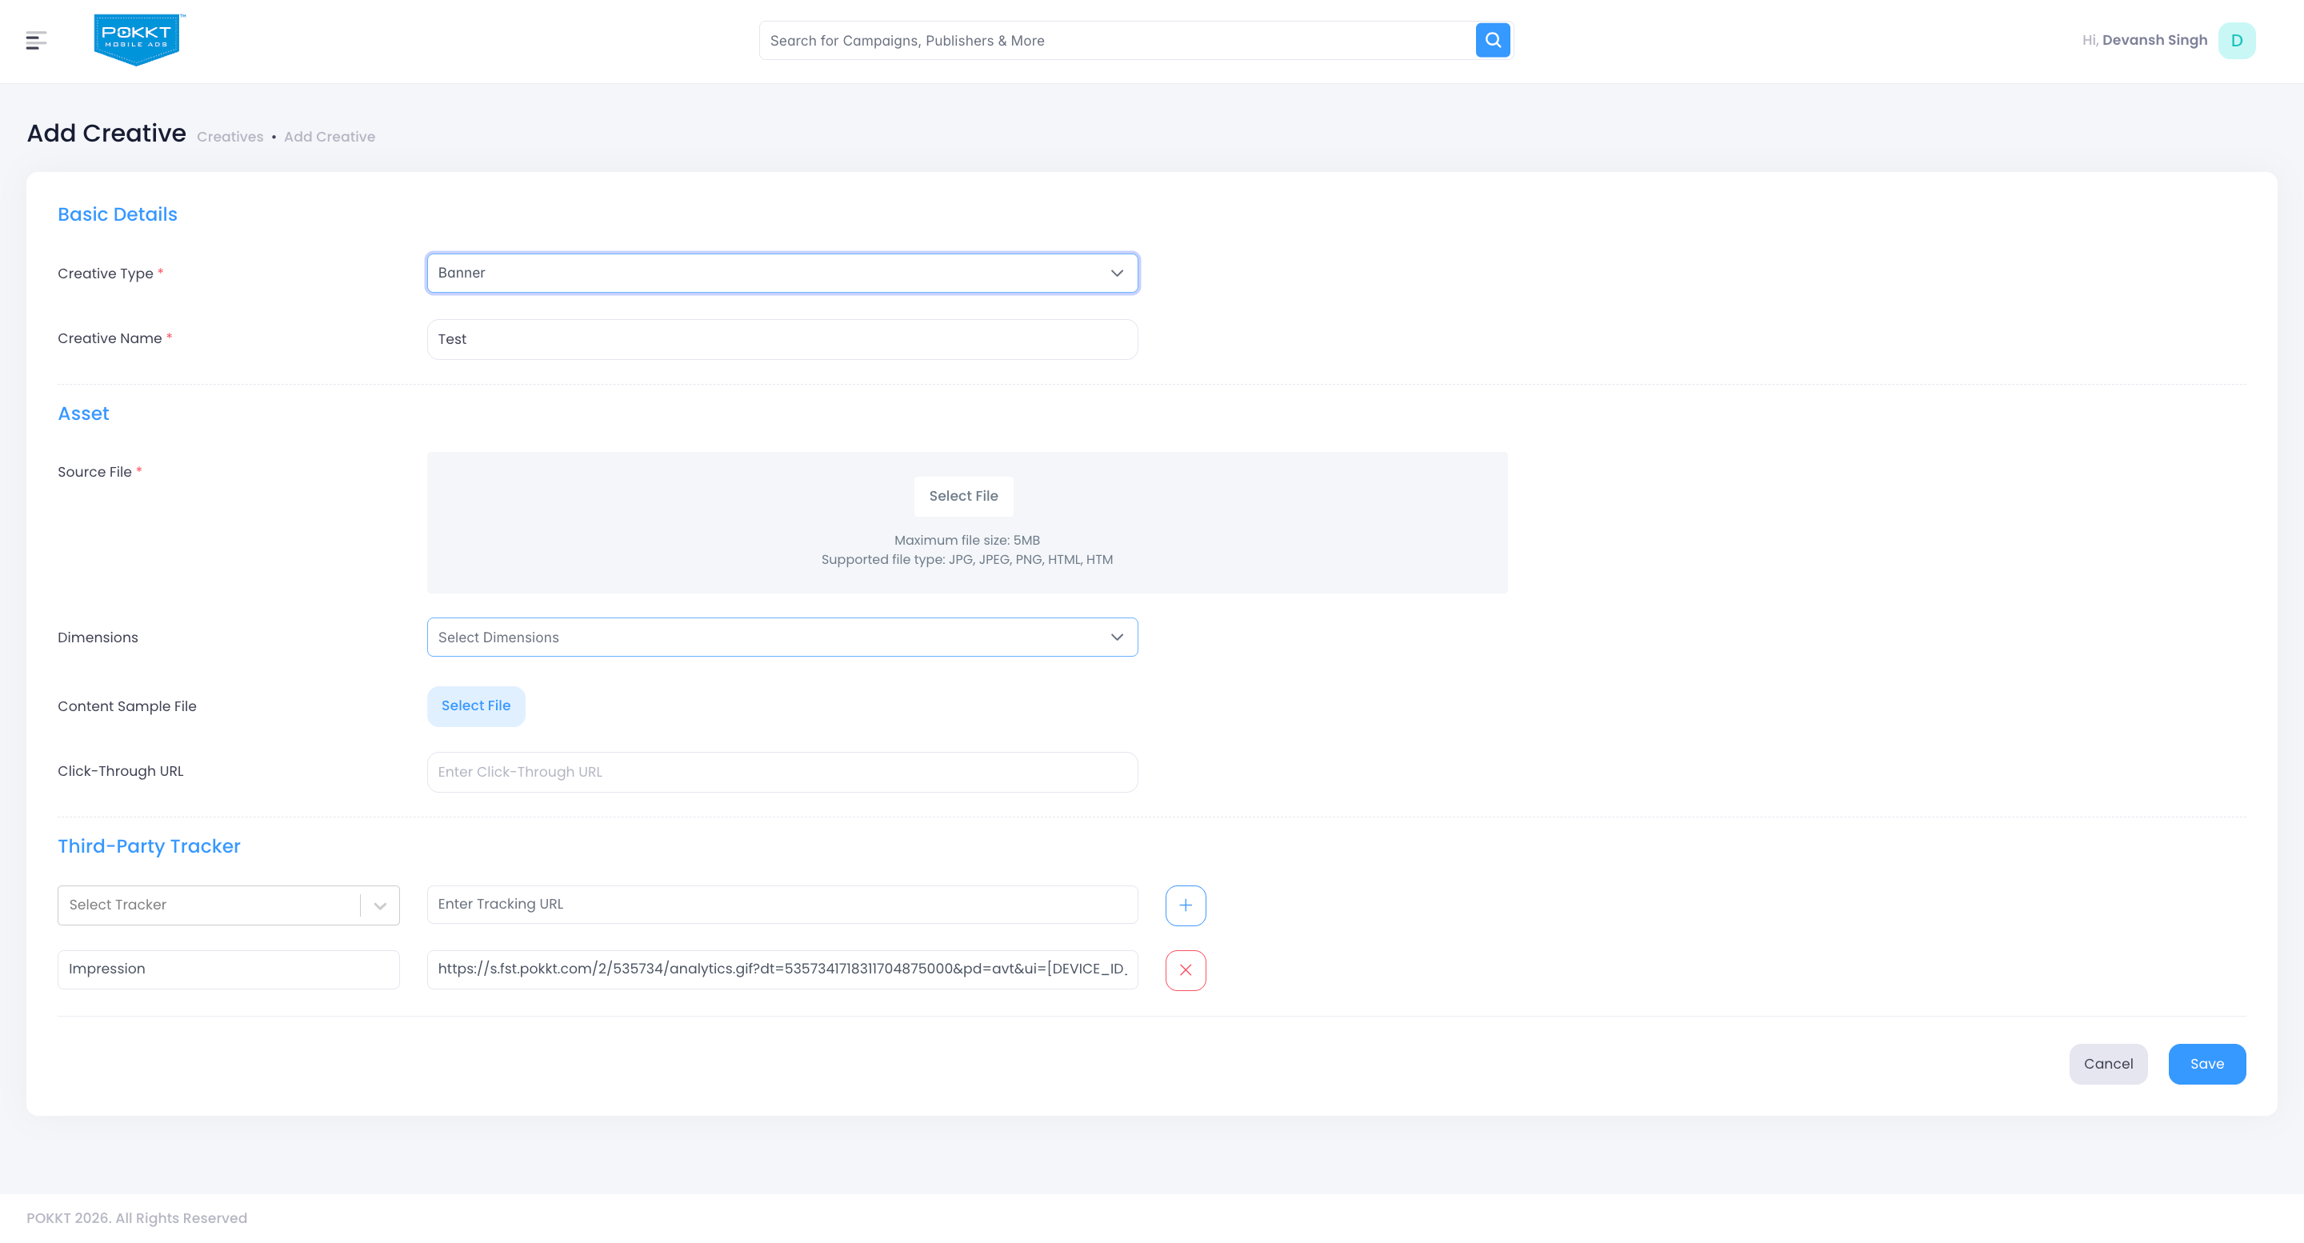
Select your Creative Format (Video, Banner or Interstitial) and upload your files.
For Video Creatives (New Optimization Feature): You can now upload multiple media files for a single creative ID. This allows the system to adaptively stream the best resolution based on the user's network speed.
-
Max File Size: 20MB
-
Supported Formats: AVI, MOV, MP4, M4V, MPEG, MPG, WEBM & WMV.
For Banner / Interstitial Creatives:
-
Max File Size: 5MB
-
Supported Formats: JPG, JPEG, PNG, HTML & HTM.
Option B: Third-Party Hosted Creatives (Updated Workflow)
Important Update: Previously, third-party URLs were added directly in the Offer details. In the new flow, you must create a creative entity here first before it can be assigned to a campaign.
-
Select Creative Format Type and enter a Creative Name.
-
Creative Tag URL: Paste your Creative/VAST tag URL.
-
Click-Through URL: Enter the landing page URL.
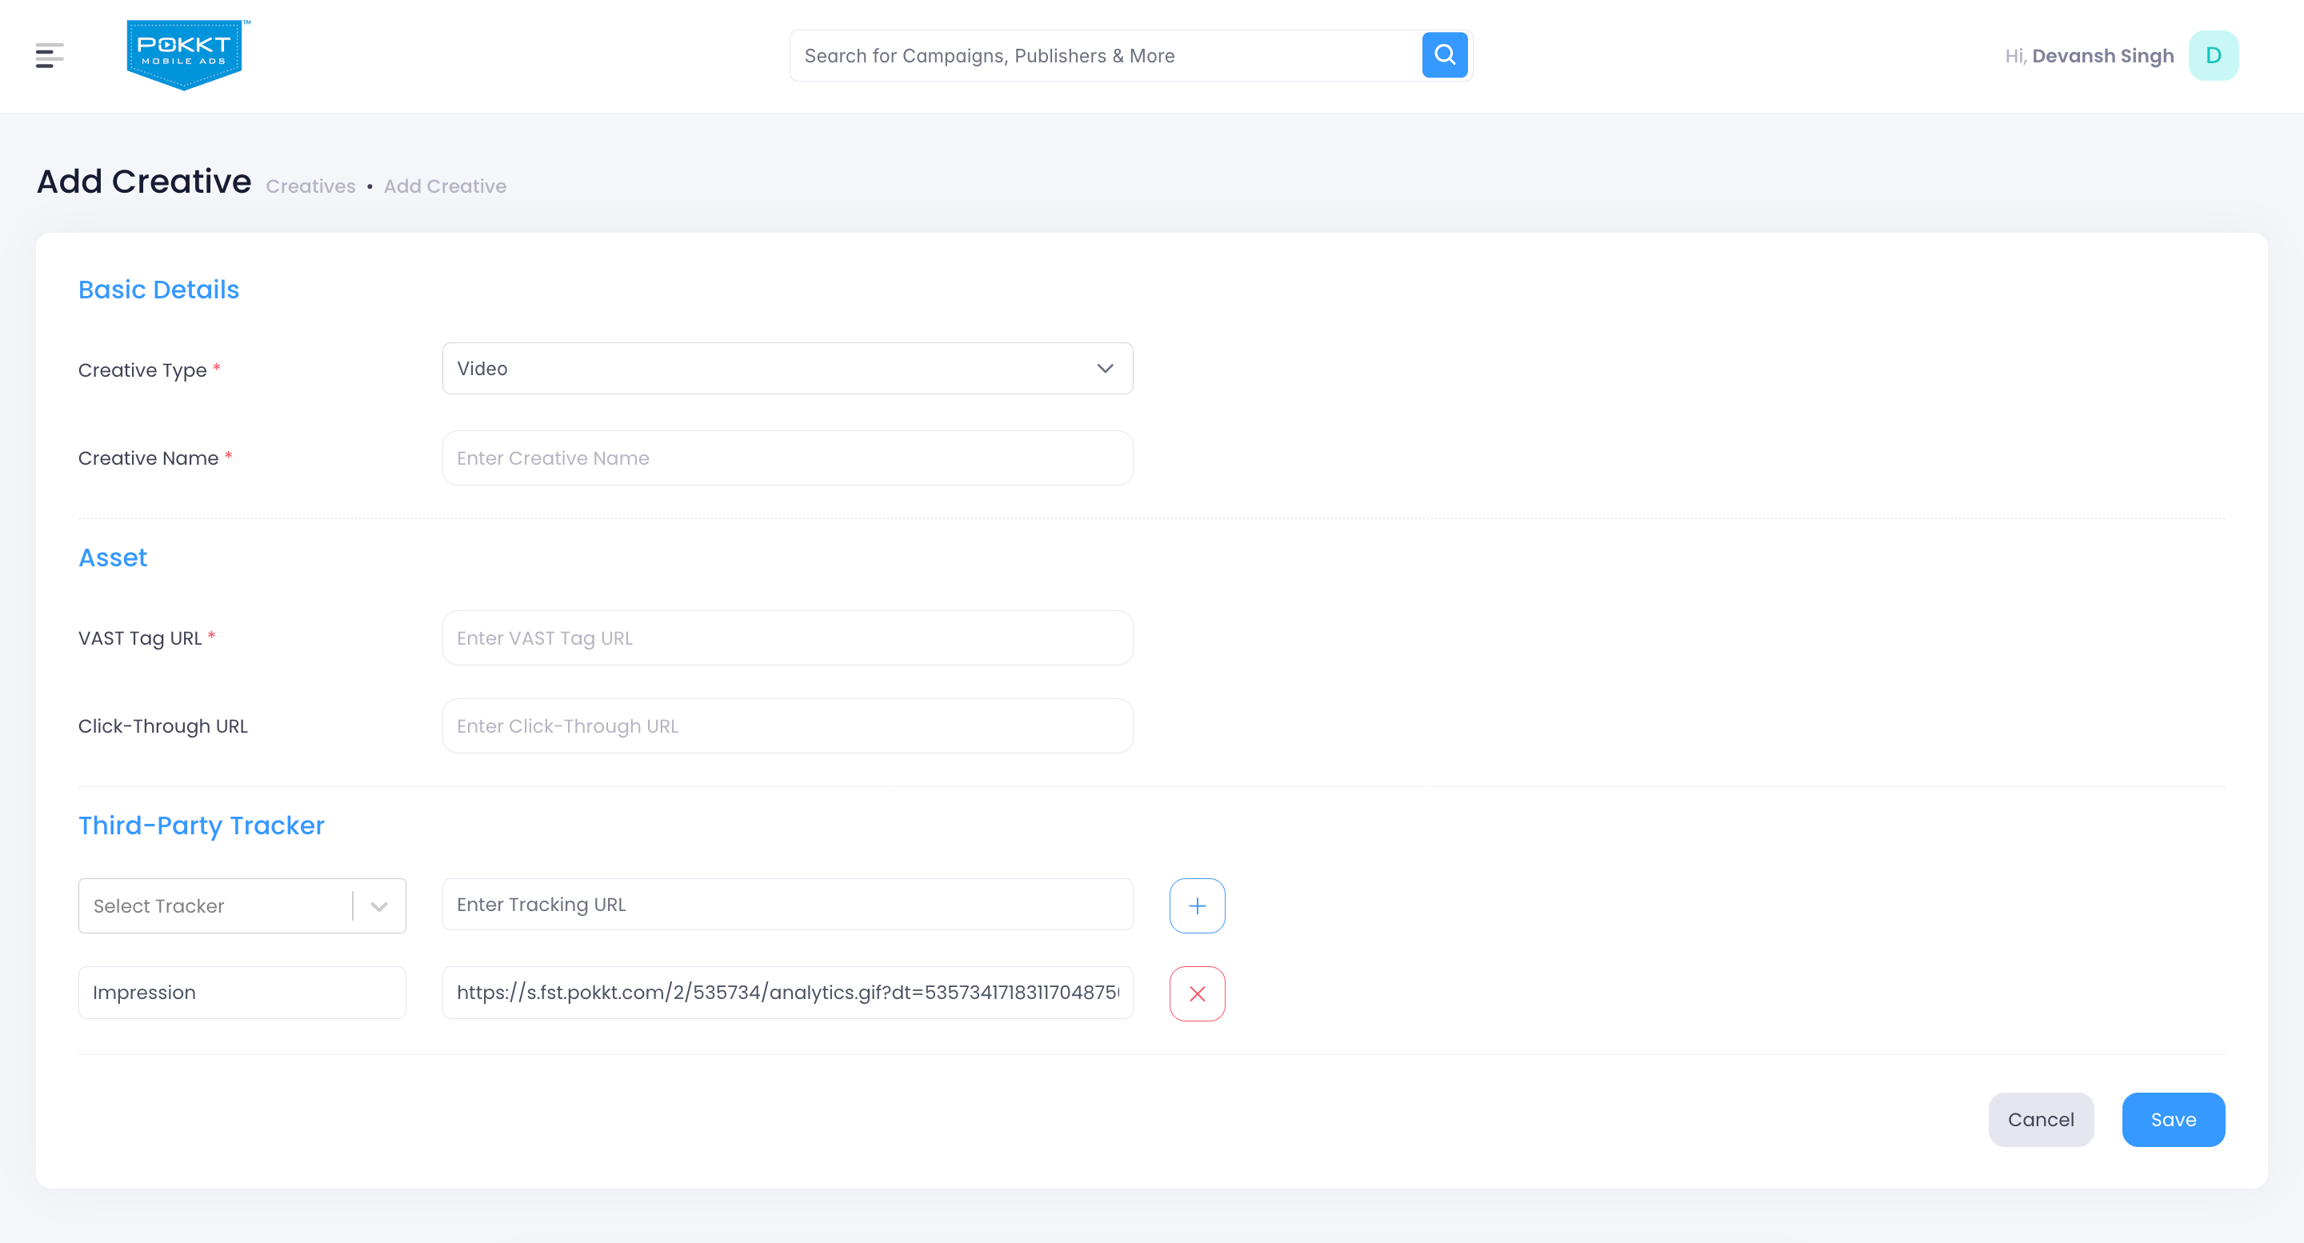
Step 5 : Add Tracking & Details
Regardless of the creative type, ensure the following details are completed to maximize reporting accuracy:
-
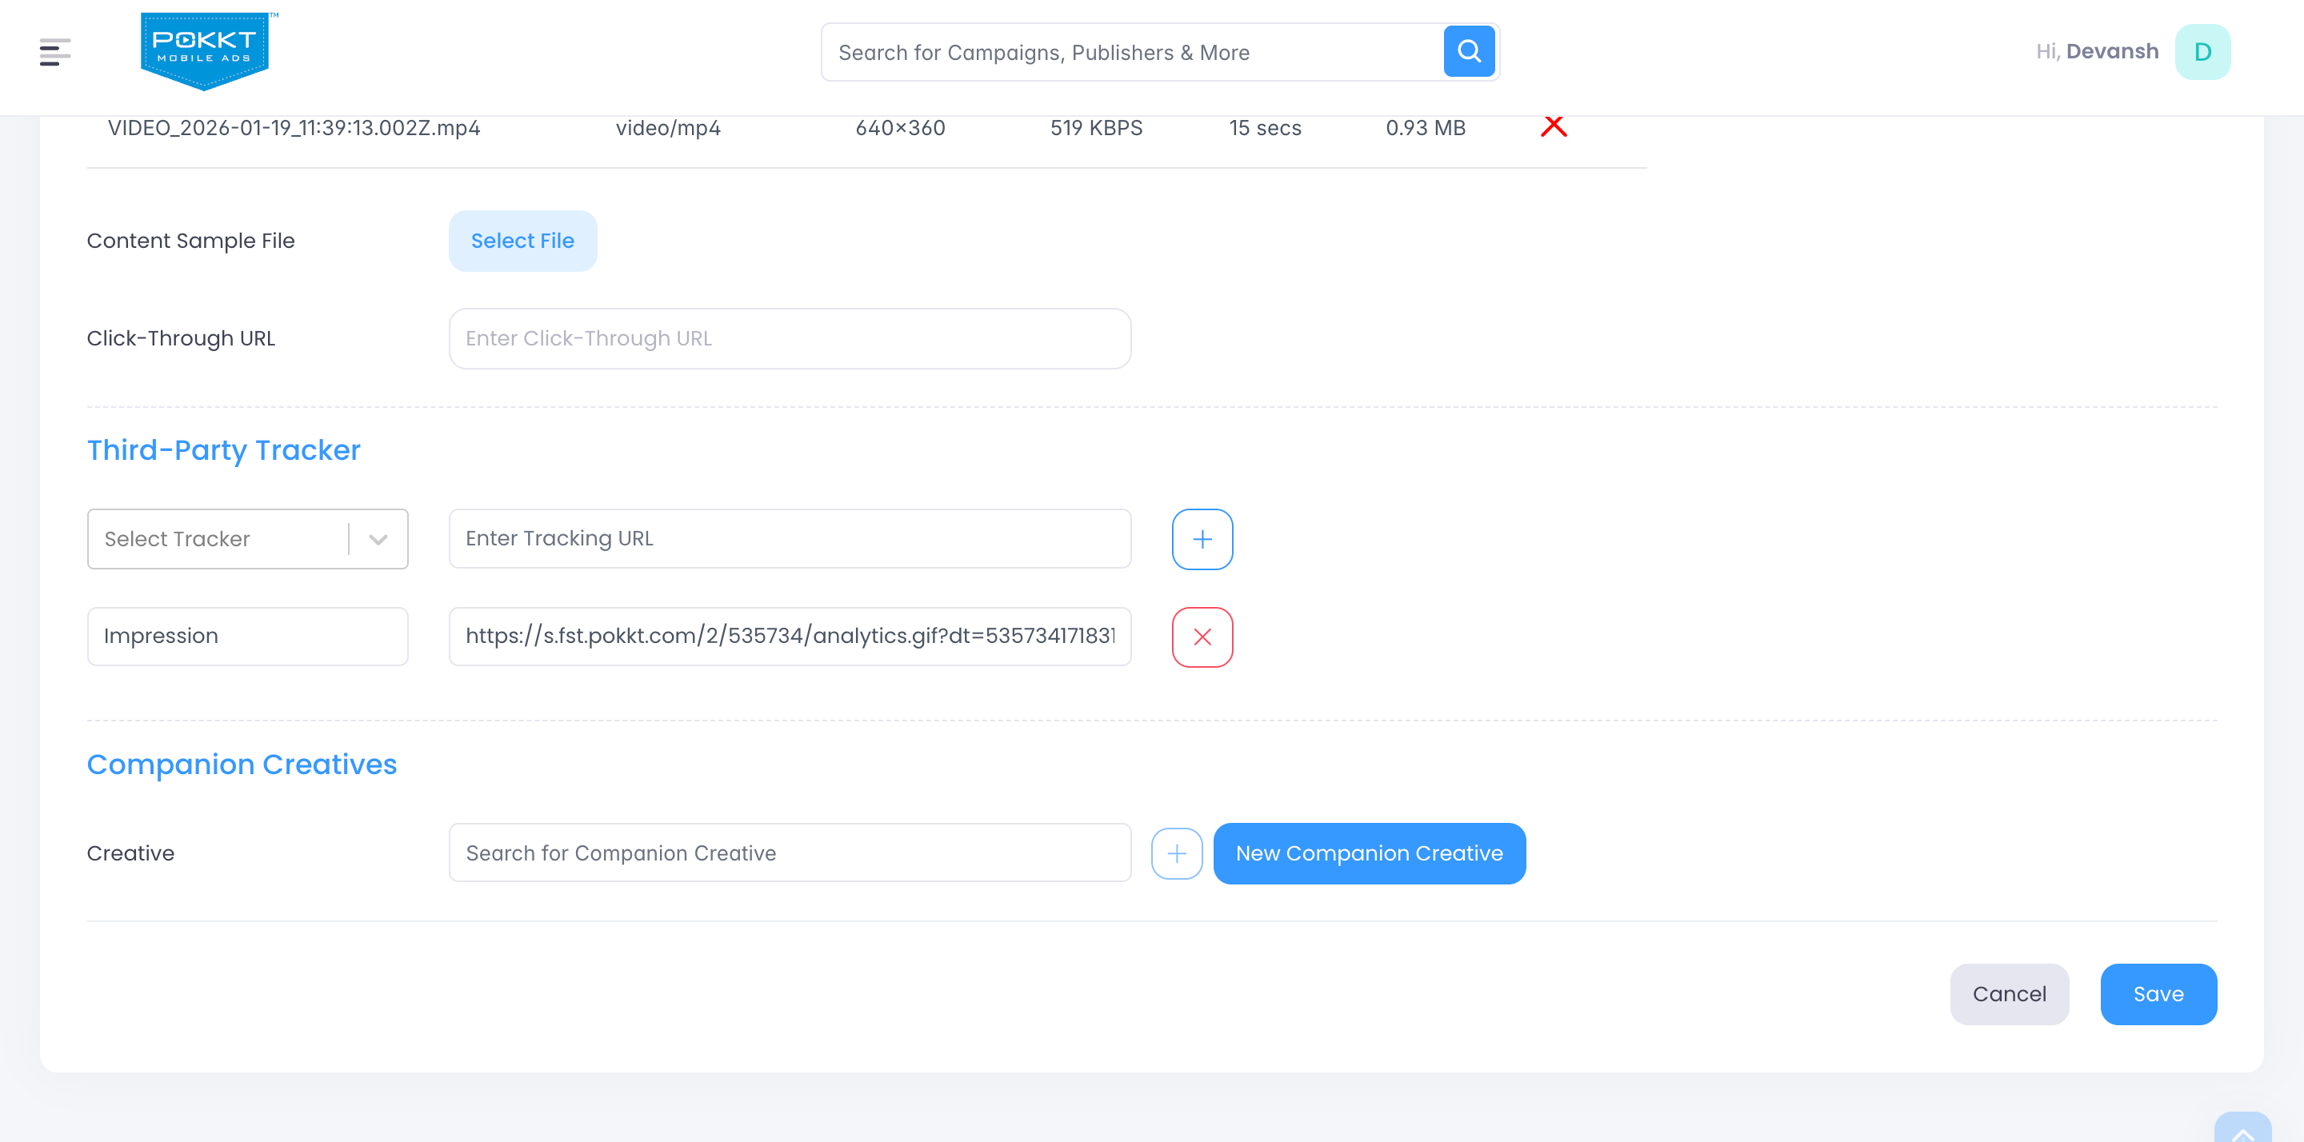
Content Sample File: (For Self Hosted only)Upload a preview file if required for internal reference.
-
Click-Through URL: Verify the landing page link.
-
Third-Party Tracker Details: Add trackers here.
Once all fields are filled, click Save. Your creative will now appear in the Manage Creatives list and is ready for use.
Step 6 : Add Endcard (For Video only)
For video creatives, you can enhance the user experience by adding an Endcard through the Companion Creative section. This allows for a persistent call-to-action once the video finishes playing.
-
Within the Add Creative screen, scroll down to the Companion Creatives section.
-
Redirect to Add Endcard: Click on the New Companion Creative button. You will be automatically redirected to the dedicated Add Endcard page.
-
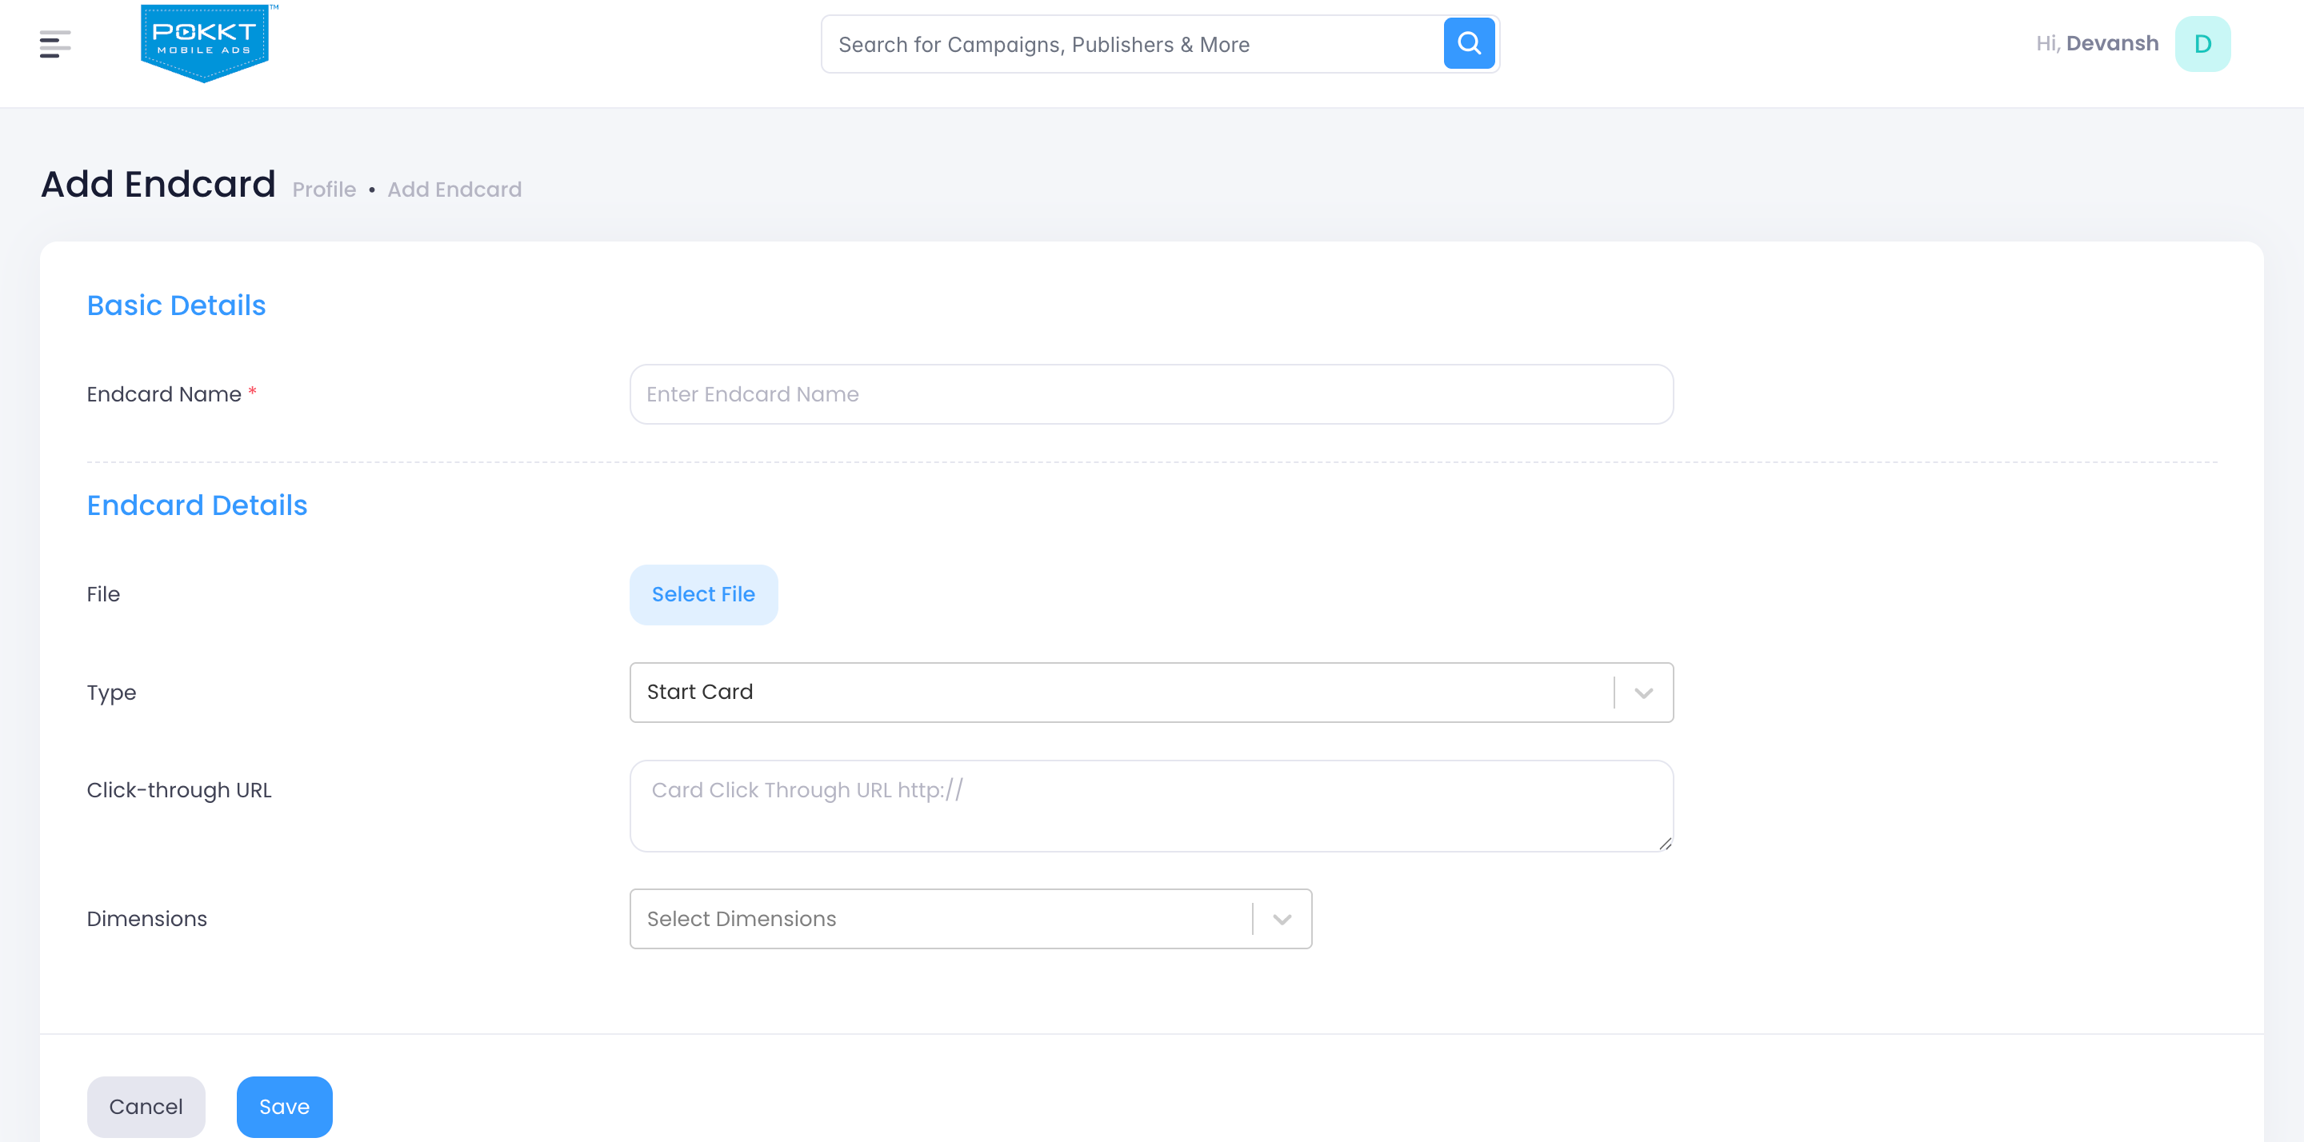
Fill Endcard Details: On the Add Endcard page, provide the following information:
-
Endcard Name: Enter a unique name for identification.
-
File: Select and upload your endcard asset.
-
Type: Choose the card type (Start Card or Endcard).
-
Click-through URL: Define the destination link for the endcard.
-
Dimensions: Select the appropriate dimensions for the asset from the dropdown menu.
-
-
Save and Link: Click Save to store the endcard profile.
-
Finalize Selection: Return to the main Add Creative page. You can now use the search bar under Companion Creatives to find and link the endcard you just created to your video creative.
Step 7 : Mapping Creatives to Offers
Now that your creatives are created, you can assign them to a campaign.
-
Navigate to the Line Item Details page (when creating or editing an Offer).
-
Select the creative(s) you wish to run.
-
Define Delivery Split: If you select multiple creatives for a single slot, you can manually define the percentage of traffic each creative receives, or let the system optimize automatically.
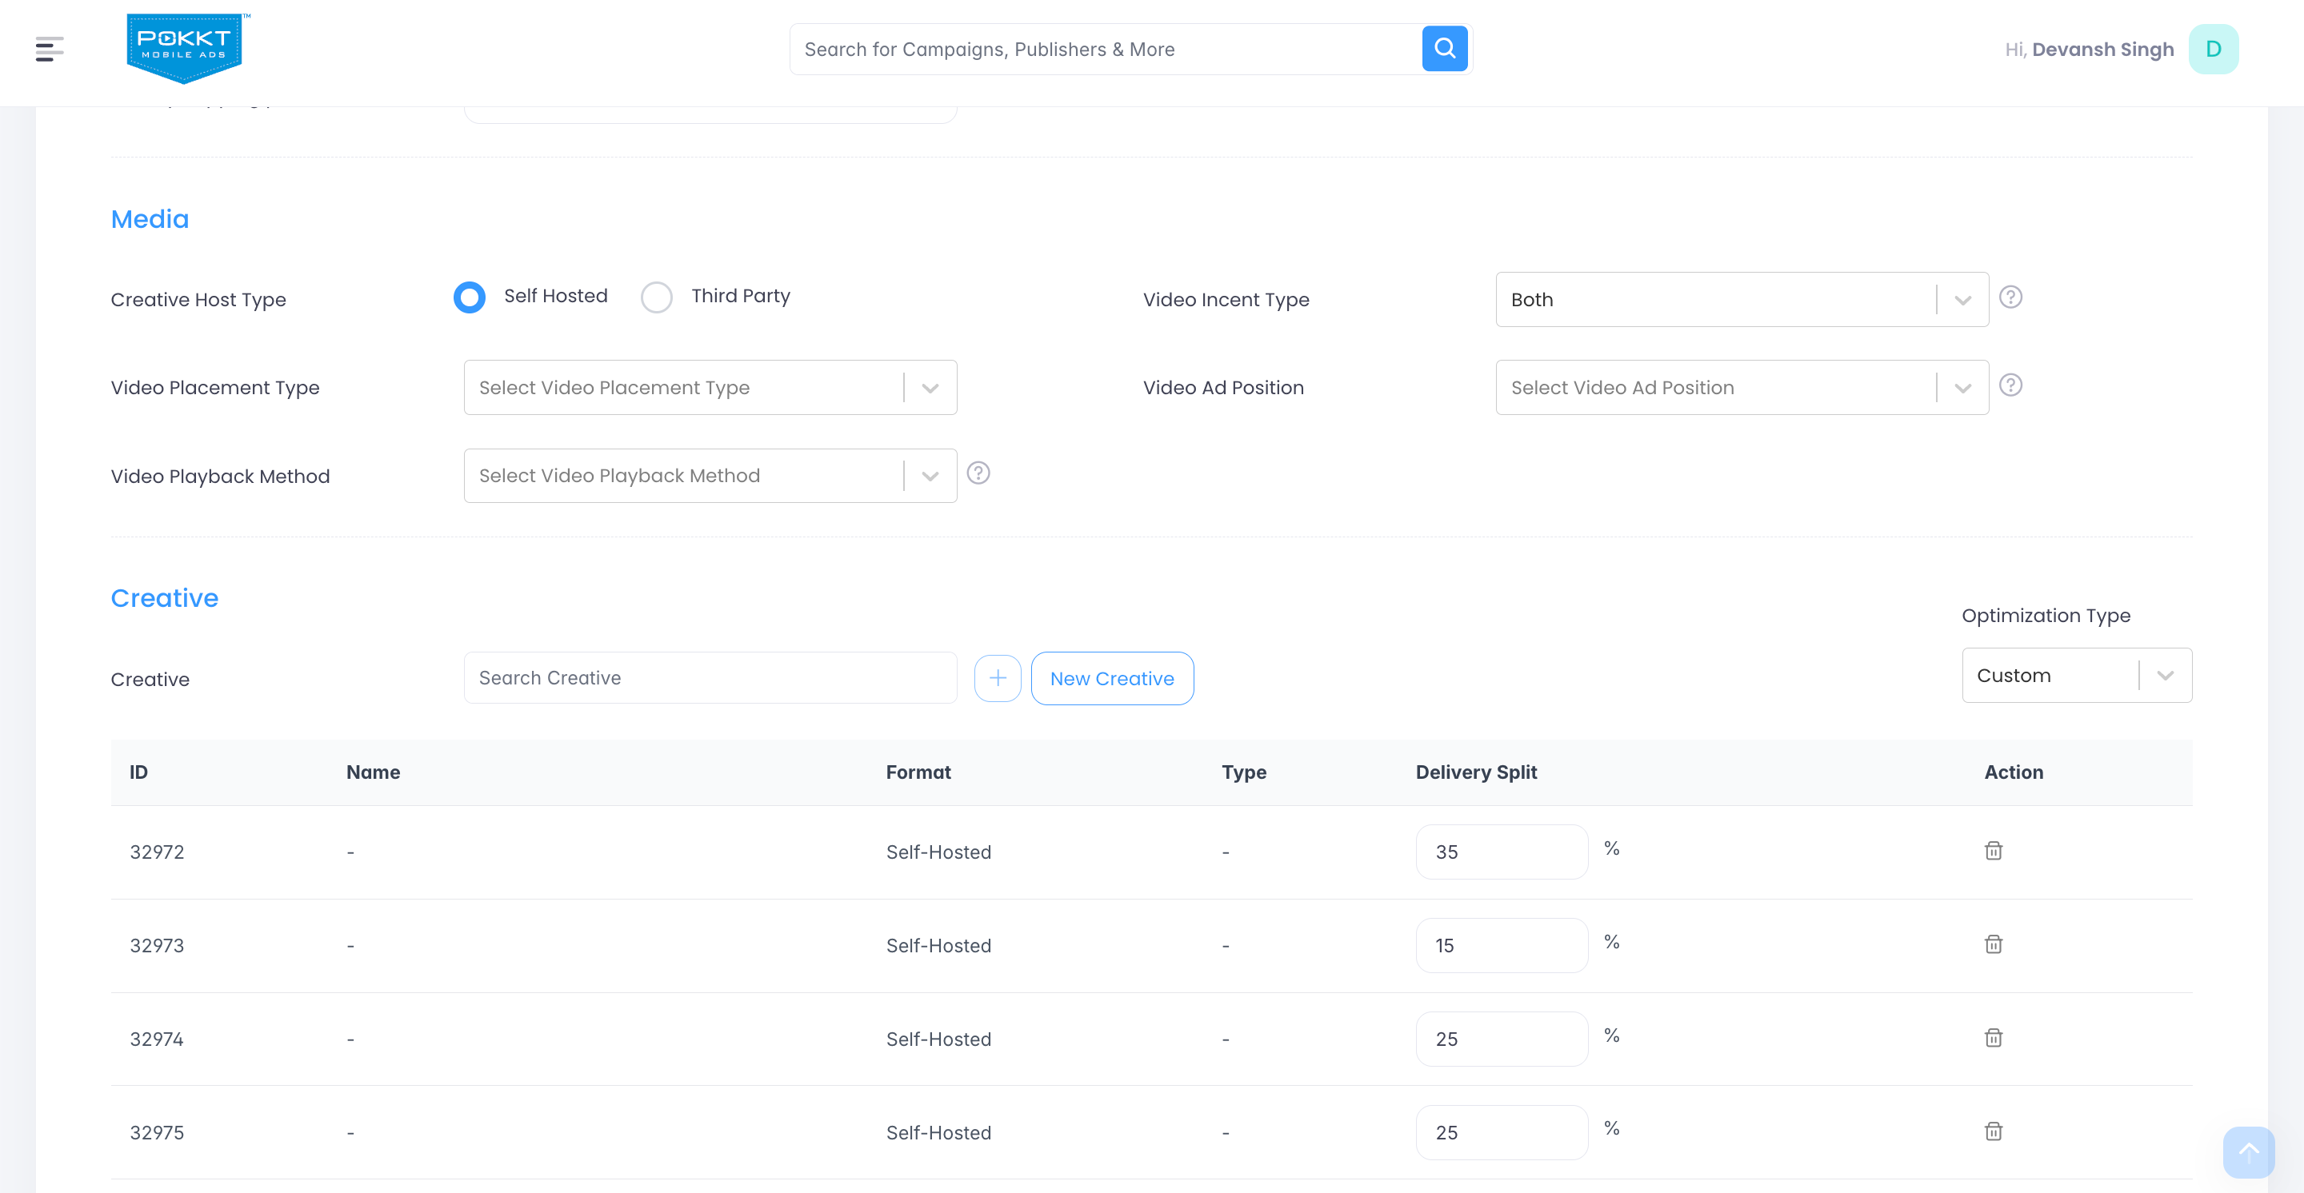
Step 8 : Monitor Creative Performance
Track the Creative performance on Creative ID and Name level from the Delivery Report.
FAQs
-
Can I edit the Delivery Split percentages after the campaign is live? Yes. Navigate to the Line Item Details page for your active offer. You can manually adjust the percentage values in the "Delivery Split" fields for your creatives and save the changes. The new distribution will take effect immediately.
-
Why do I see multiple creatives in one Offer Set now? The new Offer Level enhancement allows you to bundle multiple creative sizes (e.g., 320x50, 300x250) into a single Offer Set. The system will automatically pick the correct size based on the available inventory slot, eliminating the need to create separate offers for every size.
-
How can I tell which specific creative variant is performing best?
We have introduced granular reporting. You can now view performance data by Creative ID and Creative Name in your reports, allowing you to see exactly which video resolution or banner concept is generating the highest CTR or ROI.